Create, View, Like, and Delete Posts in Flutter
We’ve built the profile system, set up authentication, and now—it’s time to make Connect more interactive!
Today, we’re finally giving life to posts by making them:
✅ Dynamic – No more hardcoded posts! Everything now loads from Firestore.
✅ Editable – Users can create and delete their own posts.
✅ Engaging – Liking posts brings the real social app vibe.
With just these few updates, Connect already feels more like a real-world photo-sharing app. Let’s break it down!
Contents
Step 1: Make Create Post Functional
Navigate to the create_post.dart in lib/features/post/presentation/pages
Here you’ll see a createPost method if you don’t create one.
Inside this method:
➡️ Click To View Create Post Method
void createPost() async {
    final postCubit = context.read<CPostCubit>();
    final user = context.read<CAuthCubit>().currentUser;

    if (captionTextController.text.trim().isEmpty) {
      ScaffoldMessenger.of(context).showSnackBar(
        SnackBar(content: Text("Caption cannot be empty!")),
      );
      return;
    }

    ScaffoldMessenger.of(context).showSnackBar(
      SnackBar(content: Text("Creating post...")),
    );

    try {
      final postId = FirebaseFirestore.instance.collection('posts').doc().id;

      CPost newPost = CPost(
        id: postId,
        userId: user!.uid,
        userName: user.name,
        text: captionTextController.text.trim(),
        imageUrl: '',
        imageId: null,
        timestamp: DateTime.now(),
      );

      await postCubit.createPost(
        newPost,
        newPostImage: _selectedImage,
        webPostImage: _webImage,
      );

      ScaffoldMessenger.of(context).showSnackBar(
        SnackBar(content: Text("Post created successfully!")),
      );
      Navigator.pop(context);
    } catch (error) {
      ScaffoldMessenger.of(context).showSnackBar(
        SnackBar(content: Text("Failed to create post: $error")),
      );
    }
  }
1️⃣ Get the Required Cubits
We use context.read<CPostCubit>() to get access to the CPostCubit, which handles post-related operations (like saving a post to Firestore).
We also retrieve the current user from CAuthCubit, which stores user authentication details.
If we don’t do this, we won’t know who is creating the post.
2️⃣ Validate the Caption
We check if the caption text is empty (trim() removes spaces from the beginning and end).
If the user hasn’t written anything, we show a Snackbar (a small notification at the bottom) saying,
“Caption cannot be empty!”
return; ensures that if the caption is empty, the method stops here and doesn’t continue.
3️⃣ Show a “Creating Post” Message
Since creating a post might take time (uploading an image, saving to Firestore), we show a loading message so the user knows something is happening
4️⃣ Generate a Unique Post ID
Firestore allows us to generate a unique ID for each post by calling .doc().id inside the "posts" collection.This ensures that each post has a different ID.
5️⃣ Create a CPost Object
We will now create a CPost object, which represents the new post.The post stores:
- A unique ID (
postId). - The user ID (
user!.uid). - The user’s name (
user.name). - The caption text (
captionTextController.text.trim()). - A placeholder image URL (
''for now). imageId: null(since no image is uploaded yet).- The current timestamp (
DateTime.now()).
6️⃣ Upload the Post and Image
We call the createPost method inside CPostCubit to:
- Upload the post to Firestore.
- Upload an image (if one is selected).
_selectedImage is the local image file, while _webImage is for web uploads (if used).
7️⃣ Show Success Message & Navigate Back
If the post is successfully created, we show a success message.
Then, we call Navigator.pop(context); to go back to the previous screen.
8️⃣ Handle Errors
If something goes wrong (e.g., network issues, Firestore errors), we catch the error and display a failure message.
And yes don’t forget to register the post cubit in app.dart.
Now, test and run if you see a message that says the post was successfully created you are good to go.
Step 2: Make View Post Dynamic On The Home Page
First, let’s show all the posts on the home page.
1. Introduced CPostCubit for State Management
Instead of hardcoding posts, I set up a Cubit (CPostCubit) to manage the post data dynamically. This means:
- The homepage (
CHomePage) no longer stores a list of posts itself. - It fetches posts from
CPostCubit, which keeps track of the posts and updates the UI when new data is available. - The cubit starts with an empty list of posts (
CPostState(posts: [])). - When the homepage opens, it calls
postCubit.loadPosts(), which fetches posts asynchronously and emits a new state with the updated list.
3. BlocBuilder for Automatic UI Updates
- Instead of a static post list, I wrapped the UI in a
BlocBuilder<CPostCubit, CPostState>. - This means whenever
CPostCubitupdates the post list, the UI rebuilds automatically to reflect the changes.
How It Works in Action
- When the homepage loads → It triggers
postCubit.loadPosts(). - Cubit fetches posts asynchronously and updates the state.
BlocBuilderdetects the change and rebuilds the UI to show the new posts.
Now, posts are not hardcoded anymore, and the homepage automatically updates when new posts are added.
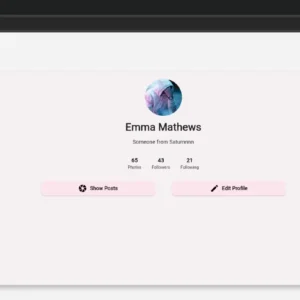
Step 2: Make View Post Dynamic On The Profile Page
Now, let’s show the user-specific posts on the profile page.
Modify the profile widget cart desktop and make it smaller.
Add these two lines to the initState of the profile page:
postCubit = context.read<CPostCubit>();
postCubit.fetchUserPosts(widget.uid);
Now, modify the desktop and mobile build methods to load the images with a bloc builder.
You can view the complete code here on GitHub: https://github.com/maitry4/Connect/
Create a new account and test it on both platforms.
Step 4: Feature To Delete Post
This is the simplest task you’ll tackle today.
First, go to the post_ui_desktop.dart in lib/features/home/presentation/components
In the onPressed field of delete IconButton call the delete method from the post cubit:
IconButton(onPressed: (){
                context.read<CPostCubit>().deletePost(widget.post.id);
              }, icon: const Icon(Icons.delete))
Do the same in the post_ui.dart in the same directory.
And yes we can only show delete button to the user who has created the post.
That’s why in both the UI’s
Create this initState method:
late String currentUserId;

  @override
  void initState() {
    super.initState();
    // Get current user's ID from Firebase Auth
    currentUserId = FirebaseAuth.instance.currentUser?.uid ?? "";
  }
And modify the UI Part:
if (widget.post.userId == currentUserId)
                IconButton(
                  onPressed: () {
                    context.read<CPostCubit>().deletePost(widget.post.id);
                  },
                  icon: const Icon(Icons.delete),
                ),
Test the functionality on both platforms.
And all set.
Step 5: Feature To Like Post
From here we will give a social app vibe to our Connect app.
Add a new field “likes” to the post entity.
This field should be a list of strings. We will store the user IDs of all those who have liked the post.
In the create post page you’ll need to pass an empty list of likes. As when a post is created there are no likes to it.
Go to post_repo and create a toggleLikePosts method that takes post id and user id.
Implement this method in firebase post repo.
➡️Click To View toggleLikePosts
@override
  Future<void> toggleLikePosts(String postId, String userId) async {
    try //try to like or dislike
    {
      // get the post
      final postDoc = await postsCollection.doc(postId).get();
      // check if the post exists
      if (postDoc.exists) {
        // get the post data in json format
        final post = CPost.fromJson(postDoc.data() as Map<String, dynamic>);

        // check if user has already liked the post
        final hasLiked = post.likes.contains(userId);

        // update(like/dislike) based of the case
        if(hasLiked){
          post.likes.remove(userId);
        } else{
          post.likes.add(userId);
        }

        // update the post doc
        await postsCollection.doc(postId).update({'likes':post.likes});
      }
      // throw error if you cannot get the post
      else{
        throw Exception('Post not found');
      }
    } // throw error if unable to like or dislike
    catch (e) {
      throw Exception('Error toggling like: $e');
    }
  }
In the post cubit, you’ll need to create a method to call this method.
Now, let’s implement these in the UI part. post_ui_desktop.dart and post_ui.dart.
toggleLikePost method:
➡️Click To View Code
late final CPostCubit postCubit;

  @override
  void initState() {
    super.initState();
    // Get current user's ID from Firebase Auth
    currentUserId = FirebaseAuth.instance.currentUser?.uid ?? "";
    postCubit = context.read<CPostCubit>();
    postCubit.fetchAllPosts();
  }

  void toggleLikePost() {
    // get current like status:
    final isLiked = widget.post.likes.contains(currentUserId);

    // like and update UI
    setState(() {
      if (isLiked) {
        widget.post.likes.remove(currentUserId); //unlike
      } else {
        widget.post.likes.add(currentUserId); //like
      }
    });

    // update like status. and revert the previos change if error occurs
    postCubit.toggleLikePost(widget.post.id, currentUserId).catchError((error) {
      setState(() {
        if (isLiked) {
          widget.post.likes.remove(currentUserId); //revert to unlike
        } else {
          widget.post.likes.add(currentUserId); //revert to like
        }
      });
    });
  }
Pass this method to the like button.
GestureDetector(
                  onTap: toggleLikePost,
                  child: Icon(
                    widget.post.likes.contains(currentUserId)?Icons.favorite:Icons.favorite_border,
                    color:widget.post.likes.contains(currentUserId)? Colors.red: Colors.black)
                  ),
                Text(widget.post.likes.length.toString()),
Further Plan
Tomorrow, in the 14th article, we will see the comment feature implementation. Logout button which we somehow missed before. Let user visit the other user’s profile.
In the 15th article, we will see the follow/unfollow feature if possible we will also cover the search feature.
In the 16th article we will see all the remaining functionality if any and pre-deployment checks. Here we will make the app much more user friendly and secure.
Finally, in the 17th article (hopefully on the 17th march, 2025) we will deploy it in firebase.