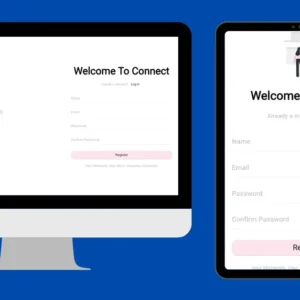
Firebase Authentication for Flutter
In this article, we’ll dive into the backend setup and Firebase connectivity for user authentication in the Connect App.
By the end of this guide, your app will be equipped with a fully functional email-password login system, all powered by Firebase.
Don’t worry about the UI yet—that’s coming up in the next article, where we’ll make everything look sleek and user-friendly.
Let’s focus on getting the core functionality ready first!
Contents
Ensure you are connected to the internet.
In the last article, we created a firebase_auth_repo.dart inside the domain folder.
Step 1: Create a Firebase Account And Setup Authentication
Today, import the auth_repo.dart and implement its class in the firebase_auth_repo.dart
➡️Click To View the Code of firebase_auth_repo.dart
import 'package:connect/features/auth/domain/entities/app_user.dart';
import 'package:connect/features/auth/domain/repos/auth_repo.dart';

class CFirebaseAuthRepo implements CAuthRepo {

  @override
  Future<CAppUser?> loginWithEmailPassword(String email, String password) {
    // TODO: implement loginWithEmailPassword
    throw UnimplementedError();
  }

  @override
  Future<CAppUser?> registerWithEmailPassword(String name, String email, String password) {
    // TODO: implement registerWithEmailPassword
    throw UnimplementedError();
  }

  @override
  Future<void> logout() {
    // TODO: implement logout
    throw UnimplementedError();
  }

  @override
  Future<CAppUser?> getCurrentUser() {
    // TODO: implement getCurrentUser
    throw UnimplementedError();
  }
}
Head over to the Firebase console in your browser.
https://console.firebase.google.com
Register/log in and click on “Get Started With a Firebase Project”
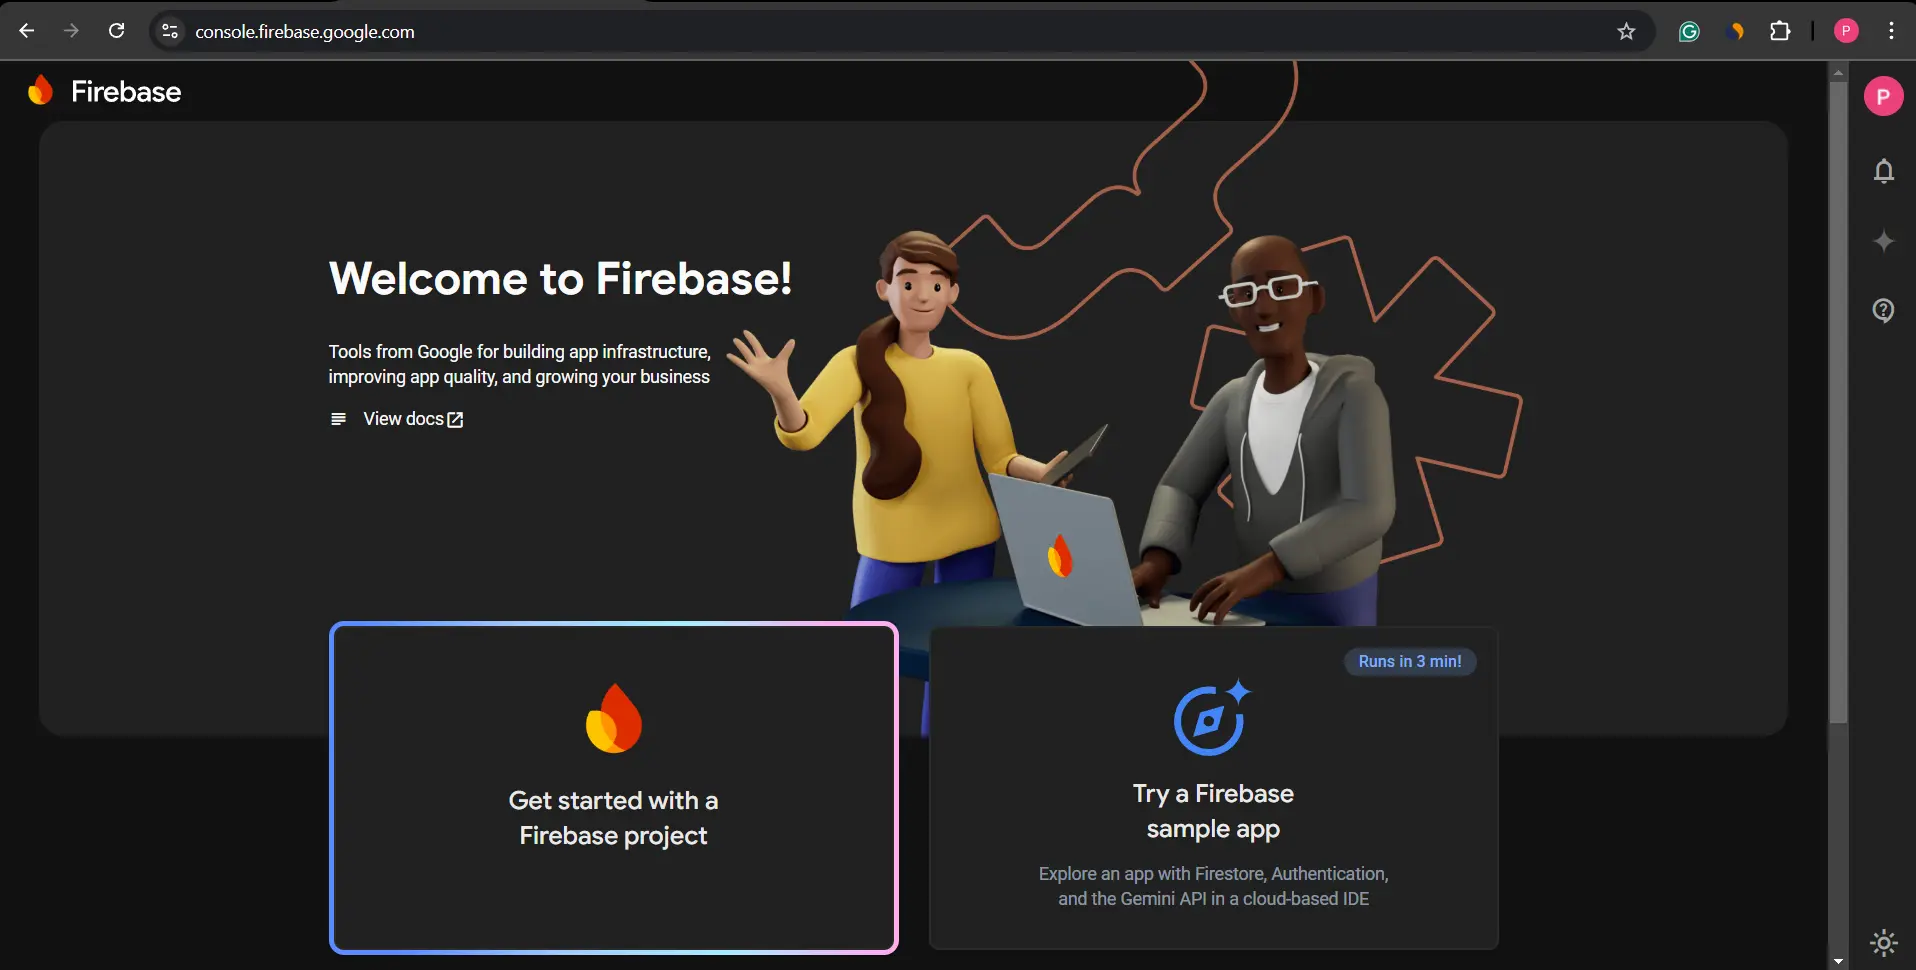
Give a name to your project. In this case “connect”
Accept both conditions.
Enable Gemini and Google Analytics if you wish to. (I have kept analytics disabled)
Now wait till your project is created.
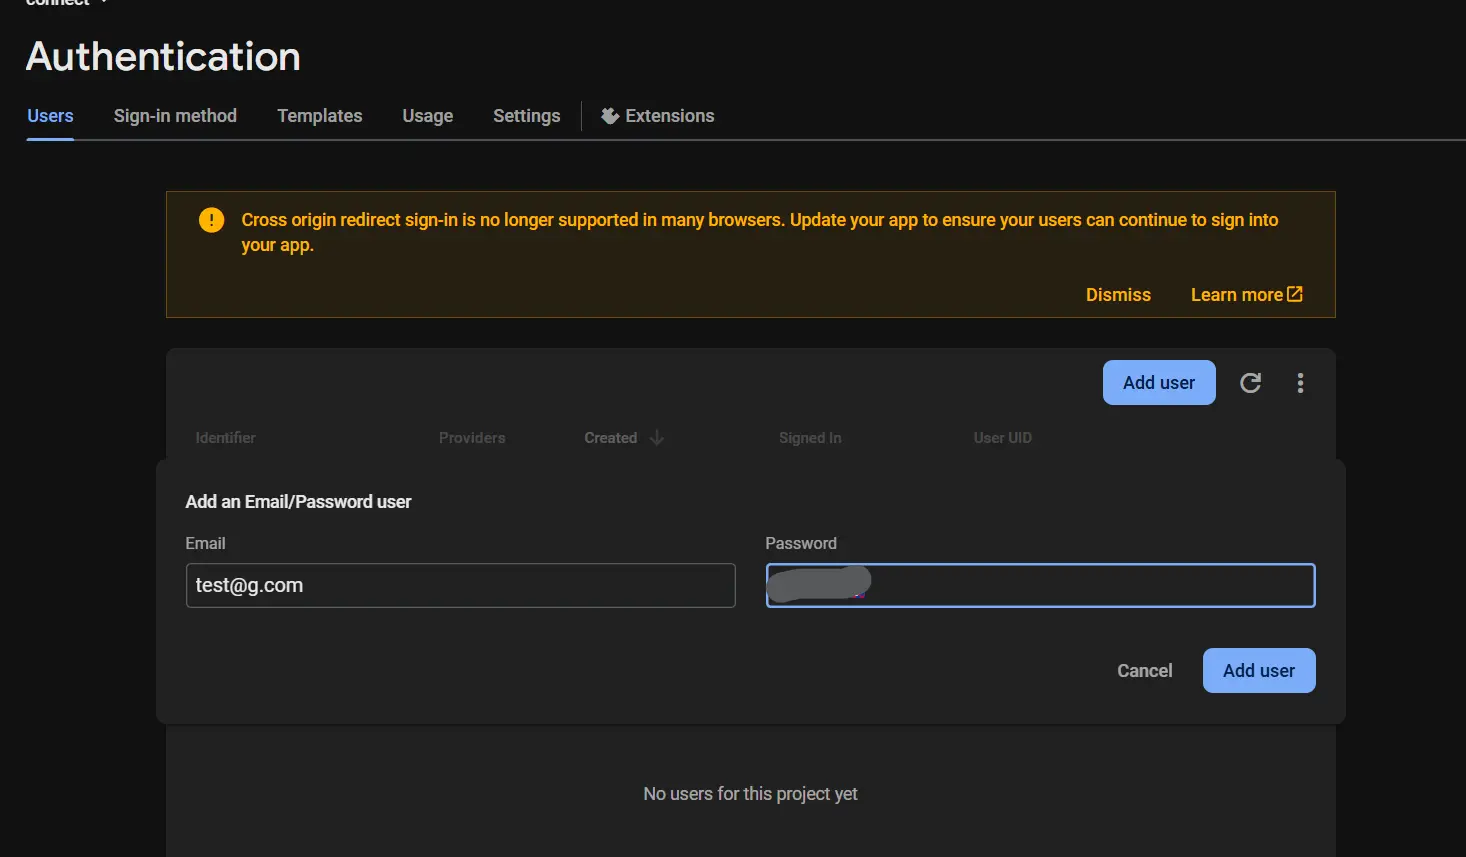
Look at the left navbar in your project. There inside the Build, you’ll see Authentication. Click on it and get started.
In the Sign-in method tab go to Email/Password.
Enable this Sign-in method. Add a dummy user from the Users tab next to Sign-in.
Step 2: Connect Firebase Account To Flutter App
Run this command in your vs code in the same directory as your app.
npm install -g firebase-tools➡️For More Details on this command click here
Explanation:
npm→ The Node Package Manager, used to install JavaScript tools.install -g→ Installs the package globally, making it accessible system-wide.firebase-tools→ Installs the Firebase CLI, a command-line tool for managing Firebase projects.
What Does It Do?
- Allows you to manage Firebase Hosting, Firestore, Cloud Functions, and Authentication from the terminal.
- Installs the Firebase CLI, which provides commands like:
firebase login→ Authenticate with Firebase.firebase init→ Set up a Firebase project.firebase deploy→ Deploy Firebase services (Hosting, Firestore, Functions, etc.).firebase emulators:start→ Run Firebase services locally.
This will install a lot of packages, let it.
(You can also install standalone the firebase CLI) (Using npm is easiest if you have node installed already. It is not native to Flutter.)
Now you would need to log in from here.
firebase loginI faced an error while solving this here’s how I resolved it:
➡️Click to View my Bug 🐞
firebase : File C:\npm\firebase.ps1 cannot be loaded because running scripts is disabled on this
system. For more information, see about_Execution_Policies at https:/go.microsoft.com/fwlink/?LinkID=135170.
At line:1 char:1
+ firebase login
+ ~~~~~~~~
    + CategoryInfo          : SecurityError: (:) [], PSSecurityException
    + FullyQualifiedErrorId : UnauthorizedAccess
After that I ran : Set-ExecutionPolicy RemoteSigned -Scope CurrentUser
And it let me log in.
But I was in an incorrect account that’s why I switched to another account this way:
And then
firebase loginAfter running this command authorize using your Gmail account in the one where you have created your project in the Firebase console.
Your Firebase account is now connected
Time to connect your project.
Step 3: Connect And Configure Firebase Project To Flutter App
Run this command to install flutterfire globally and activate it:
flutter pub global activate flutterfire_cliFirebase Authentication for Flutter
➡️For More Details on this command click here
Explanation:
flutter pub→ Manages Dart packages for Flutter.global activate→ Installs and makes a package globally available across all Flutter projects.flutterfire_cli→ Installs the FlutterFire CLI, a tool to simplify Firebase setup in Flutter apps.
What Does It Do?
- Enables linking Firebase to multiple platforms (Android, iOS, Web, macOS).
- It installs the FlutterFire CLI globally on your system.
- Allows you to run
flutterfire configure, which helps automatically set up Firebase for your Flutter project.
Next run:
flutterfire configureFirebase Authentication for Flutter Firebase Authentication for Flutter Firebase Authentication for Flutter
This will fetch all projects on your Firebase account.
Select any one of them.
Press Enter to configure it for all the platforms ticked right.
Let it do the rest of the connection and registration magic.
Step 4: Configure Firebase In main.dart
After all of this, you’ll notice a file created firebase_options.dart.
And it will be showing some error.
It is because we do not have the Firebase core package installed.
flutter pub add firebase_coreFirebase Authentication for Flutter Firebase Authentication for Flutter Firebase Authentication for Flutter
Make the main method async and add these two lines of code to it:
➡️Click to View the Code of main.dart
import 'package:connect/firebase_options.dart';
import 'package:firebase_core/firebase_core.dart';
import 'package:flutter/material.dart';

void main() async {
  // firebase setup
  WidgetsFlutterBinding.ensureInitialized();
  await Firebase.initializeApp(options: DefaultFirebaseOptions.currentPlatform);
  // run app
  runApp(const MyApp());
}

class MyApp extends StatelessWidget {
  const MyApp({super.key});

  @override
  Widget build(BuildContext context) {
    return const MaterialApp(
      debugShowCheckedModeBanner: false,
      home: Scaffold(),
    );
  }
}
Test the app once if you are getting a blank white screen.
You are good to go.
Step 5: Configure Firebase Email And Password Login
Run the command to install the Firebase Authentication module.
flutter pub add firebase_authFirebase Authentication for Flutter Firebase Authentication for Flutter Firebase Authentication for Flutter Firebase Authentication for Flutter
Go to the firebase_auth_repo.dart
- Create an instance of Firebase auth
- You just need to do a little error handling and calling of methods from this instance in the methods.
Start with the registration method.
➡️Click to View the Code of firebase_auth_repo.dart
import 'package:connect/features/auth/domain/entities/app_user.dart';
import 'package:connect/features/auth/domain/repos/auth_repo.dart';
import 'package:firebase_auth/firebase_auth.dart';

// This class implements authentication methods using Firebase Authentication
class CFirebaseAuthRepo implements CAuthRepo {
  // Get an instance of Firebase Authentication to interact with Firebase Auth services
  final FirebaseAuth firebaseAuth = FirebaseAuth.instance;

  @override
  Future<CAppUser?> loginWithEmailPassword(String email, String password) async {
    try {
      // Attempt to sign in with the provided email and password
      UserCredential userCredential = await firebaseAuth.signInWithEmailAndPassword(
        email: email,
        password: password,
      );

      // Create a CAppUser instance using the retrieved Firebase user details
      CAppUser user = CAppUser(
        uid: userCredential.user!.uid, // Unique user ID from Firebase
        email: email, // User's email
        name: '', // Name is left empty as Firebase does not provide it directly
      );
      return user;
    } catch (e) {
      // Catch any errors and throw a custom exception
      throw Exception('Login Failed: $e');
    }
  }

  @override
  Future<CAppUser?> registerWithEmailPassword(String name, String email, String password) async {
    try {
      // Attempt to create a new user with email and password
      UserCredential userCredential = await firebaseAuth.createUserWithEmailAndPassword(
        email: email,
        password: password,
      );

      // Create a CAppUser instance with user details
      CAppUser user = CAppUser(
        uid: userCredential.user!.uid, // Unique user ID from Firebase
        email: email, // User's email
        name: name, // Name provided by the user during registration
      );
      return user;
    } catch (e) {
      // Catch any errors and throw a custom exception
      throw Exception('Registration Failed: $e');
    }
  }

  @override
  Future<void> logout() async {
    // Sign out the currently logged-in user
    await firebaseAuth.signOut();
  }

  @override
  Future<CAppUser?> getCurrentUser() async {
    // Get the currently authenticated user from Firebase
    final firebaseUser = firebaseAuth.currentUser;

    // If no user is logged in, return null
    if (firebaseUser == null) {
      return null;
    } else {
      // Return a CAppUser instance with user details
      return CAppUser(
        uid: firebaseUser.uid, // Unique user ID
        email: firebaseUser.email!, // User's email (non-nullable assumption)
        name: '', // Name is not stored in Firebase Auth, so it's left empty
      );
    }
  }
}
➡️Click to View Explanation if the code seems difficult
1. loginWithEmailPassword(String email, String password)
Purpose:
This method allows users to log in using their email and password.
How it Works:
- Calls
signInWithEmailAndPasswordfrom Firebase Authentication. - If successful, it retrieves a
UserCredentialobject containing the authenticated user’s details. - A
CAppUserinstance is created using theuidandemailretrieved from Firebase. - The
namefield is left empty because Firebase Authentication does not store names. - If an error occurs (e.g., wrong credentials), an exception is thrown with an error message.
Key Considerations:
- Firebase automatically handles security measures like password encryption.
- Ensure the app UI provides proper feedback when the login fails.
2. registerWithEmailPassword(String name, String email, String password)
Purpose:
This method registers a new user using their email, password, and name.
How it Works:
- Calls
createUserWithEmailAndPasswordto register the user in Firebase Authentication. - On successful registration, Firebase returns a
UserCredentialobject. - A new
CAppUserinstance is created using theuid,email, and the providedname. - If registration fails (e.g., weak password, duplicate email), an exception is thrown.
Key Considerations:
- Firebase does not store the user’s name directly, so additional storage (e.g., Firestore) is needed if you want to retain the name.
- Email verification can be enabled to ensure user authenticity.
3. logout()
Purpose:
Logs out the currently authenticated user.
How it Works:
- Calls
signOut()onfirebaseAuth, which removes the user session.
Key Considerations:
- Ensure the UI updates correctly after logout (e.g., navigate to the login screen).
- Clear any user-related local data upon logout.
4. getCurrentUser()
Purpose:
Retrieves the currently authenticated user, if any.
How it Works:
- Calls
firebaseAuth.currentUserto check if a user is logged in. - If no user is found, it returns
null. - If a user exists, a
CAppUserinstance is created usinguidandemail. - The
namefield is left empty because Firebase Authentication does not store names.
Key Considerations:
Can be used to automatically log in users if they are already authenticated.
This method helps maintain session persistence in the app.
With the backend and Firebase connectivity in place, our Connect App is now one step closer to becoming a complete, fully functional application.
We’ve successfully integrated Firebase Authentication, laying a solid foundation for secure user login and registration.
Tomorrow we will be heading towards the presentation layer of authentication.
We will follow BLOC Architecture for that.
Until then, stay happy and keep coding.
Firebase Authentication for Flutter Firebase Authentication for Flutter Firebase Authentication for Flutter Firebase Authentication for Flutter Firebase Authentication for Flutter