Cached Images File Uploads
Today, we worked on making profile images load faster with caching, allowing users to update profile pictures seamlessly, and ensuring everything looks good across devices.
GitHub Link: https://github.com/maitry4/Connect/
Cached Images File Uploads
Contents
Step 1: Modifying The Profile Page UI For Desktop
Go to the profile_card_widget.dart in the lib/features/profile/presentation/components
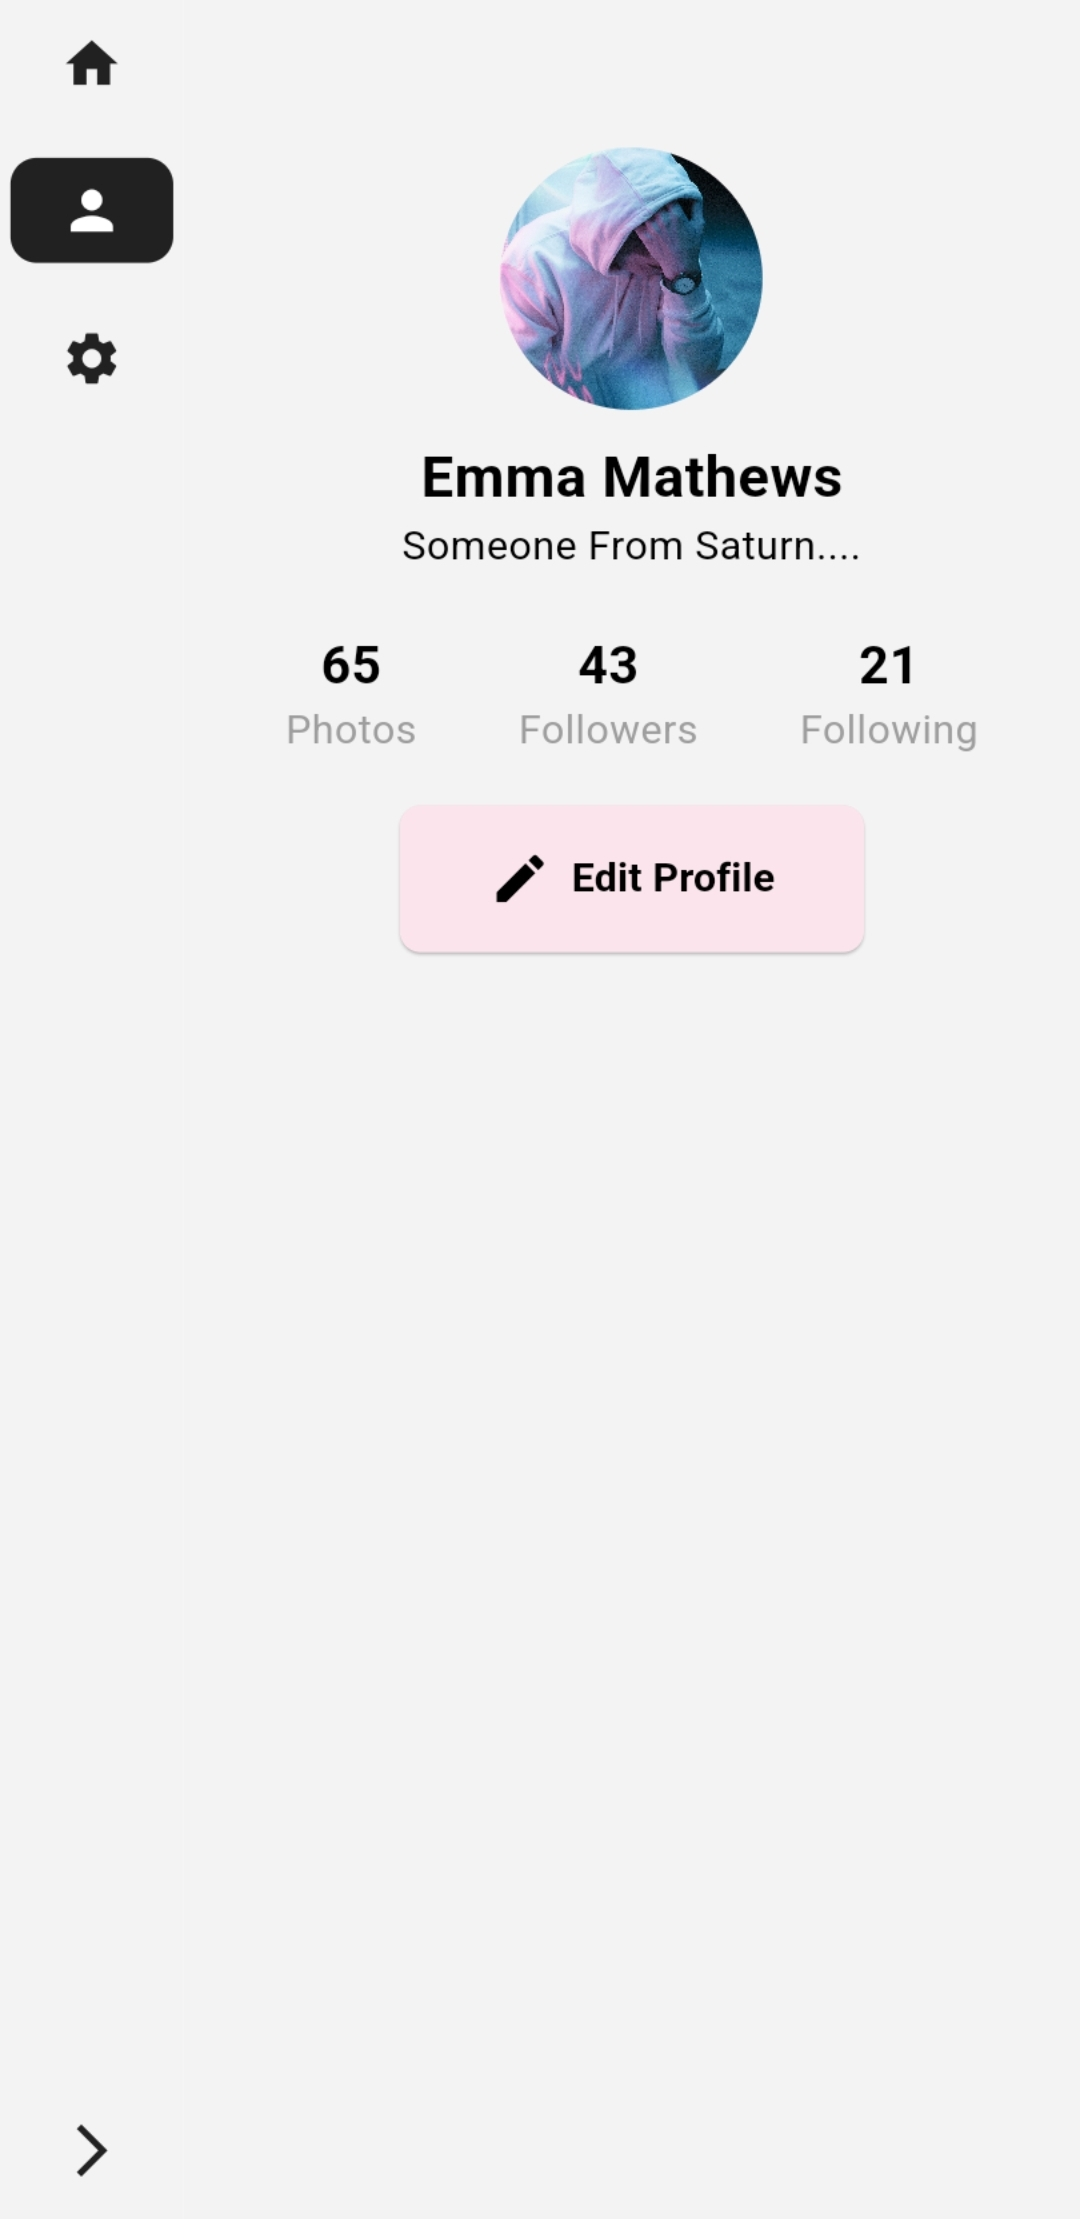
See In the Desktop version of the profile page you can see we have a circular avatar.
const CircleAvatar(
                radius: 50,
                child: Icon(Icons.person),
              ),
Cached Images File Uploads Cached Images File Uploads Cached Images File Uploads Cached Images File Uploads
Now, if there is a profile image and it got loaded correctly then, I want to show it as a cached image.
Why cached?
Because there is a chance that the user doesn’t have high-speed 10 G(joking😅) internet.
Add this package:
flutter pub add cached_network_imageReplace the circular avatar with the profile image.
CachedNetworkImage(
  imageUrl: widget.user.profileImageUrl,
  imageBuilder: (context, imageProvider) => CircleAvatar(
    radius: 50,
    backgroundImage: imageProvider,
  ),
  placeholder: (context, url) => const CircleAvatar(
    radius: 50,
    child: CircularProgressIndicator(),
  ),
  errorWidget: (context, url, error) => const CircleAvatar(
    radius: 50,
    child: Icon(Icons.person, size: 50, color: Colors.grey),
  ),
),
Just to test it out.
Go to imagekit’s user_profiles folder that you created earlier.
Upload a dummy image.
Copy its URL and paste it into the Firebase database profile image URL field.
Run and see if the image comes up on the desktop version of the profile page.
Cached Images File Uploads Cached Images File Uploads Cached Images File Uploads Cached Images File Uploads
Pretty Cool, No??
Step 2: Configure For Mobile
Open your android/app/build.gradle file.
Locate the android block and update it as follows:
android {
    namespace "com.example.connect"
    compileSdkVersion 34
    ndkVersion flutter.ndkVersion

   ...

    defaultConfig {
        ...
        minSdkVersion 21
        targetSdkVersion 34
 ....
Run flutter Clean Then, flutter pub get
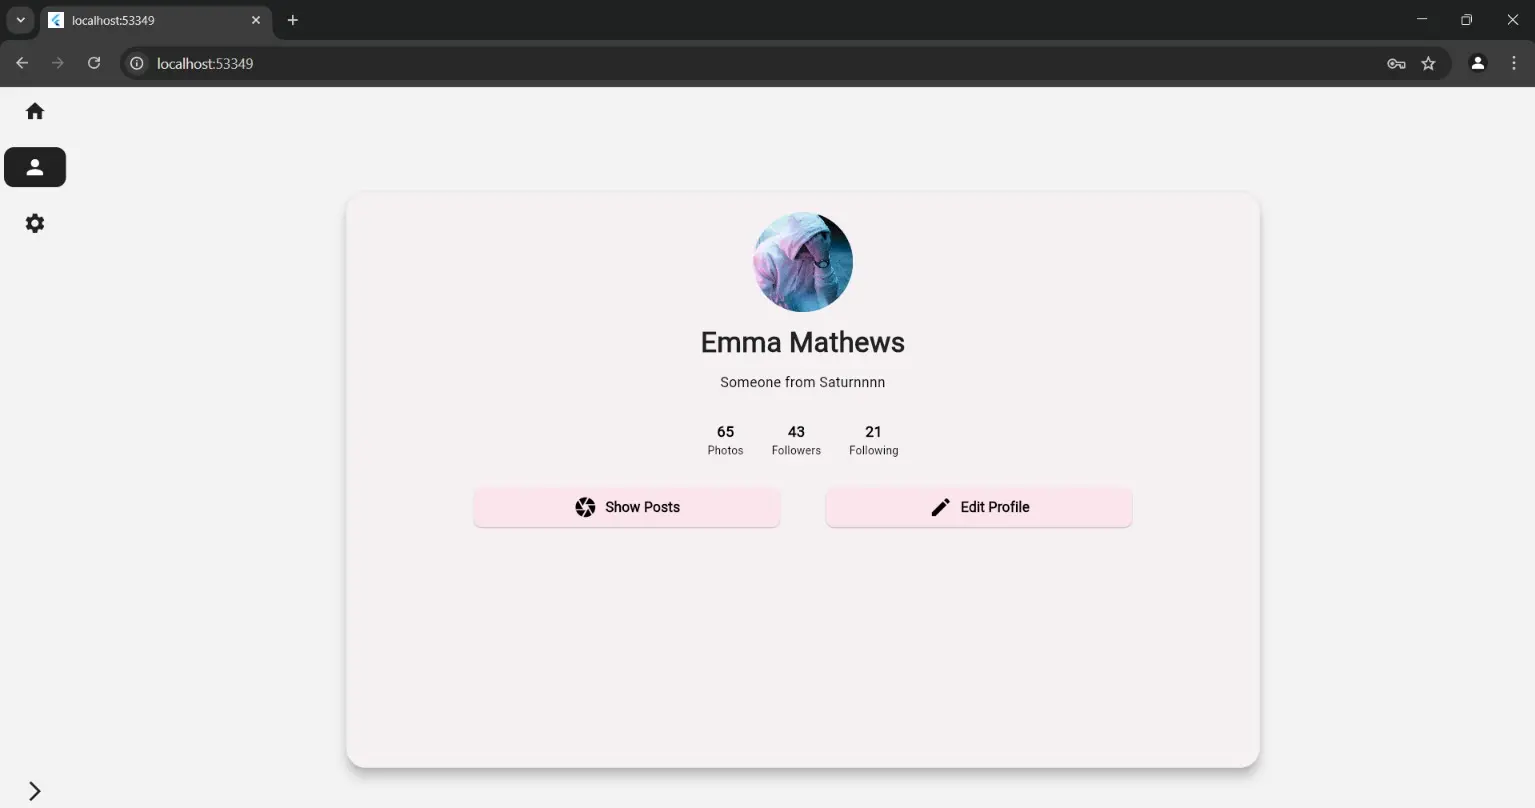
Step 3: Modifying The Profile Page UI For Mobile
Go to the profile_page.dart in the lib/features/profile/presentation/pages in the _buildMobileLayout method
CircleAvatar(
              radius: res.width(20),
              backgroundColor: Colors.grey[300],
              child: const Icon(Icons.person),
            ),
As you could have guessed already we will modify this to a cached image too.
CachedNetworkImage(
              imageUrl: usr.profileImageUrl,
              imageBuilder: (context, imageProvider) => CircleAvatar(
                radius: 50,
                backgroundImage: imageProvider,
              ),
              placeholder: (context, url) => const CircleAvatar(
                radius: 50,
                child: CircularProgressIndicator(),
              ),
              errorWidget: (context, url, error) => const CircleAvatar(
                radius: 50,
                child: Icon(Icons.person, size: 50, color: Colors.grey),
              ),
            ),
It’s the same as before except for the way we pass the image URL of course.
Run again this time on a phone.
The result should look like this:
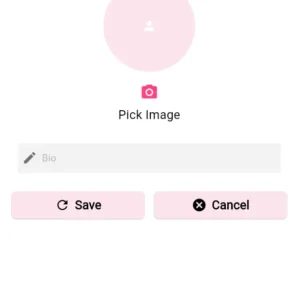
Step 4: Modifying The Edit Profile Page UI For Desktop
Head over to the profile_edit_page.dart in lib/features/profile/presentation/pages
Create a new variable for the selected image and a new method to set the selected image.
Also, modify the updateProfile method.
File? _selectedImage;

  // Function to update profile
  void updateProfile() {
    final profileCubit = context.read<CProfileCubit>();

    if (bioTextController.text.isNotEmpty || _selectedImage != null) {
      profileCubit.updateProfile(
        uid: widget.profUser.uid,
        newBio: bioTextController.text,
        newProfileImage: _selectedImage, // Pass image file if selected
      );
    }
  }

  // Function to update selected image
  void setProfileImage(File? image) {
    setState(() {
      _selectedImage = image;
    });
  }
Pass these new values to the desktop layout widget of the profile edit page. Along with the current profile image.
CProfileEditDesktop(
        webImage: _webImage,
        bioController: bioTextController,
        updateProfile: updateProfile,
        profileImageUrl: widget.profUser.profileImageUrl, // Existing URL
        selectedImage: _selectedImage, // New selected image (if any)
        setProfileImage: setProfileImage, // Callback to update image
      ),
Take these arguments in the desktop version of the profile edit page. Before that convert it to a stateful widget
class CProfileEditDesktop extends StatefulWidget {
   Uint8List? webImage;
  final TextEditingController bioController;
  final VoidCallback updateProfile;
  final String profileImageUrl;
  final File? selectedImage;
  final void Function(File?, Uint8List?) setProfileImage;

  CProfileEditDesktop({
    super.key,
    required this.bioController,
    required this.updateProfile,
    required this.profileImageUrl,
    required this.selectedImage,
    required this.setProfileImage,
    required this.webImage,
  });
Now, create a method to pick an image in this file.
  Future<void> _pickImage() async {
    FilePickerResult? result = await FilePicker.platform.pickFiles(
      type: FileType.image,
      withData: kIsWeb, // For web, load image as Uint8List
    );

    if (result != null) {
      if (kIsWeb) {
        _webImage = result.files.single.bytes; // Web: Use bytes
        setProfileImage(null, _webImage);
      } else {
        File newImage = File(result.files.single.path!); // Mobile: Use File
        setProfileImage(newImage, null);
      }
    }
  }

// Modify setProfileImage
  void setProfileImage(File? image, Uint8List? webImage) {
    setState(() {
      _selectedImage = image;
      _webImage = webImage;
    });
  }
Modify the Circular avatar and the pick image icon.
widget.selectedImage != null
                  ? CircleAvatar(
                      radius: 50,
                      backgroundImage: FileImage(widget.selectedImage!),
                    )
                  : widget.webImage != null
                      ? CircleAvatar(
                          radius: 50,
                          backgroundImage: MemoryImage(widget.webImage!), // For web
                        )
                      : CachedNetworkImage(
                          imageUrl: widget.profileImageUrl,
                          imageBuilder: (context, imageProvider) =>
                              CircleAvatar(
                            radius: 50,
                            backgroundImage: imageProvider,
                          ),
                          placeholder: (context, url) => const CircleAvatar(
                            radius: 50,
                            child: CircularProgressIndicator(),
                          ),
                          errorWidget: (context, url, error) =>
                              const CircleAvatar(
                            radius: 50,
                            child: Icon(Icons.person,
                                size: 50, color: Colors.grey),
                          ),
                        ),
Test the desktop version now.
Step 5: Modifying The Edit Profile Page UI For Mobile
For mobile, you need to do the same remove the CProfileImagePicker and then put the code above there too.
With a few tweaks, you’ll be able to do the same in the mobile version too.
Don’t forget to add the pickimage method.
Test it and it should work fine.
Conclusion:
With today’s updates, profile images now load faster, look better, and can be updated easily—all while keeping the UI clean and responsive.
Next up? We’ll enhance the profile edit experience further and refine the flow to make updates feel instant & seamless.
If you’ve ever worked on a profile UI, how did you handle image uploads & responsiveness? Let me know! 🚀