Since you started programming you might have the desire 🤩 to make your own apps.
Designed by you from idea to execution.
In this post and the next few posts, we’ll be learning the CustomTkinter library of Python.
And be sure that you’ll be able to make desktop applications with ease at the end.
And whenever you encounter any errors❗ or problems feel free✅ to ask them in the comment section below. No matter how big or small it is I’ll do my best to help you out👍.
I would also cover some possible errors that I encountered when I was learning so that your learning process is easy.
This is going to be fun and crazy😄 learning as it has always been. I am super excited to see what we will together create at the end.
Let’s get started…
Contents
Previous post’s challenge’s solution
Click Here to get the solution to that challenge. I have kept it in another article to prevent making this one unnecessarily long.
What is CustomTkinter and Why use it?
Ok, so till now we dealt🤝 with inputs and outputs from the console screen, it was all text-based.
Like, say you want to input two numbers and print their sum This is how the output would look:-
Enter a number: 10
Enter another number: 20
30
But, with a graphical user interface, it would be something like this:-
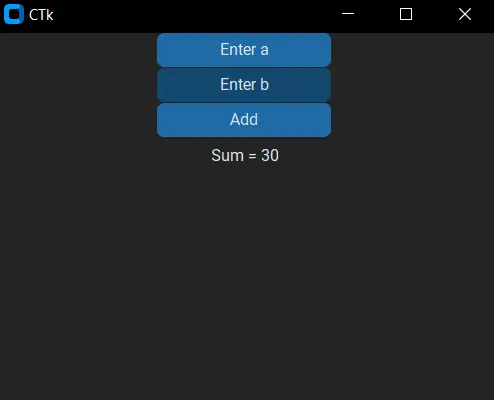
And we are using CustomTkinter (we will call it CTk) because it’s as easy to use as Tkinter and is modern. The same thing designed in Tkinter would look like this:-
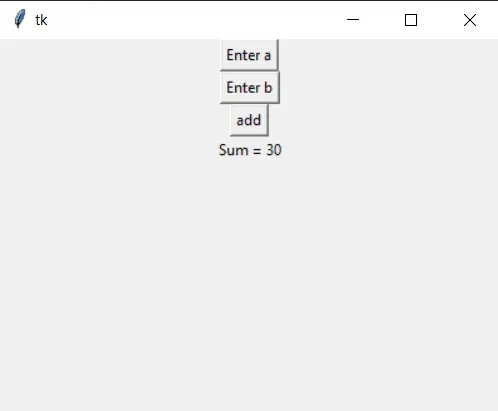
So, customtkinter is a modern GUI library in python that is based on python’s standard library Tkinter.
The basic structure of a GUI in CustomTkinter
To start using this library we would first need to install it. Type:-
pip install customtkinterNow we need to import it:-
from customtkinter import *Whenever you open any app a window🗔 pops up right? So, whenever you make any GUI you need to first make a window. The way you do it in customtkinter:-
app = CTk()Let’s now give dimensions(size) to the window:-
app.geometry("400x300")Label Widget
Now let’s give it some text (text is called a label widget in GUI. Everything you display on the window is a widget.):-
text = CTkLabel(app, text="Hello World!")To display this text on the window:-
text.pack()Finally, we need to set up an event loop.
app.mainloop()A constant loop runs whenever a GUI app runs. This is how it detects the actions performed. Like clicking on or hovering over the mouse, etc. This loop is called the EVENT loop.
Here’s the complete code:-
from customtkinter import *
# Setting up a window
app = CTk()
# Giving it a size
app.geometry("400x300")
# Creating a label
text = CTkLabel(app, text="Hello World!")
# Showing the label
text.pack()
# Runnig an event loop
app.mainloop()
Output:
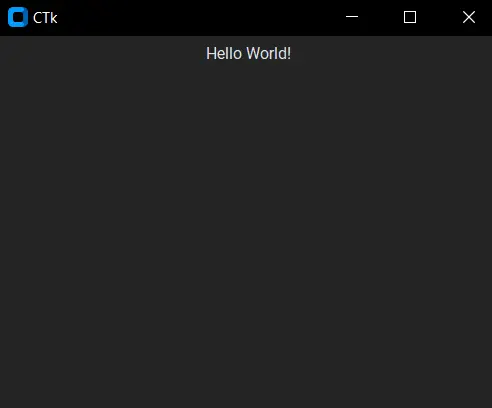
You can also set the appearance mode.
This means you can decide whether your app will have a dark theme or a light theme or the theme that the system has.
Default is the theme of the system. And because my system’s theme is dark the output is in dark.
To set the theme:-
set_appearance_mode("system")  # default value
set_appearance_mode("dark")
set_appearance_mode("light")
To set a default color of the theme:-
set_default_color_theme("dark-blue")
# Colors: "blue" (default), "green", "dark-blue"
You need to add these lines just after the import statement.
And yes you can import the library like this:-
import customtkinter
'''If you import it this way, you would need
to use its classes and functions
using it's name everytime.'''
Positioning using Grid
Here, in this code, we used the pack() function to place our label(text) widget on the window. This is a straightforward way of positioning(placing) widgets(elements) on the window.
But, this doesn’t provide any customizations(It does some but the grid() is handier to me). That is why we will use the grid() function.
For this, let’s add a new text/label widget:- (You can do it using a single text too)
# Creating a label
text = CTkLabel(app, text="Hello World!")
text2 = CTkLabel(app, text="How are you?")
Now, let’s show the label widgets on the window:-
# Showing the label
text.grid(row=0,column=0, padx=10)
text2.grid(row=0,column=1, padx=10)
We used padx so that the widgets have some space in between them. To give space around from top and bottom we can use pady.
Output:
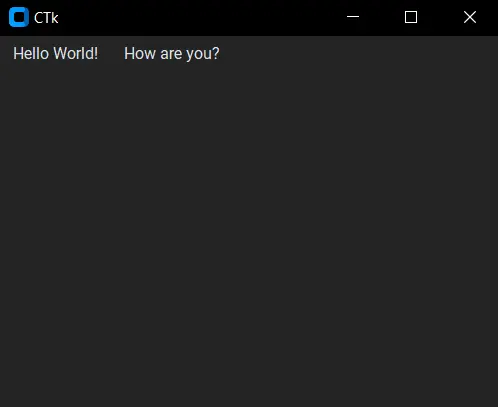

Row and column arguments are just like rows and columns of a normal grid.
Hello world! is written at 0th row and 0th column.
How are you? is written in the 0th row and 1st column.
It can be imagined as rows and columns like that in an excel sheet.
There is more to positioning we will take a deeper dive into it as needed along the way.
For now, let’s take a look at button widgets.
Button Widget
Like labels(texts) buttons are also widgets.
To create a button:-(You need to replace the code of the label widget. All the rest will be the same.)
btn = CTkButton(master=app, text="Click Me!")
#writing master is not compulsory.
#You can directly write app as we did above
To show the button:-
btn.pack()Have ever seen a button that doesn’t perform any action on clicking? Well, there are but they are made disabled. So to make the button disabled:-
#To disable when the button is made
btn = CTkButton(master=app, text="Click Me!", state="disabled")
#Or disable after the button is made
btn.configure(state="disabled")
But, you don’t want a disabled button right? So to make it perform some action we need to create a function that tells the button what to do when clicked:-
def clicked(): #You can name it anything.
    """Adds a label to the window,
       Everytime the button is clicked."""
    label = CTkLabel(app, text="You clicked the button.") #creating label
    label.pack() #showing label
To connect this function to the button:-
#To configure when the button is made
btn = CTkButton(master=app, text="Click Me!", command=clicked)
#Or configure after the button is made
btn.configure(command=clicked)
Output:
It will show a button on the window. When clicked this button displays a new label of “You clicked the button.” every time.
Now, this button can have different customizations. You can change:-
- width, height
- corner radius
- text_color, background color, or even hover color
- Font style.
You can do a lot of other customizations. They can be used just as we used the text or command arguments.
For the button’s official documentation -> Click here.
Entry/Input Widget
Time for taking some inputs from the user.
To do that we will use the entry widget of customtkinter. (I know input would be a better name but 🤷♀️)
Making an entry widget:-
password = CTkEntry(app, placeholder_text="password please...")The placeholder_text argument is to have some text already in the input box so that we can know what to enter in it. It’s just like giving a prompt inside the input function.
To display it on the widget:-
password.pack()Output:
So, not to mention entry widget also has no. of customizations possible. You can read them in the documentation here.
We know how to take the input but what if you want to use the input?
Well, for that you would need to use the get() function on the entry widget. We will get this value inside the clicked() function and will give it as text to be displayed when the button is clicked. So, that we can confirm its working:-
def clicked():
    p = password.get()
    label = CTkLabel(app, text=p)
    label.pack()
After this when you run the program, enter a password, and then will click the button the password you entered will be printed.
This is cool, right? But, before you have a play around with this. Let’s make the clicked() function a check function that checks whether the entered password is correct or not.
def clicked():
    cp = "I don't know"
    p = password.get()
    if p == cp:
        label = CTkLabel(app, text="Correct password")
        label.pack()
    else:
        label = CTkLabel(app, text="Incorrect password")
        label.pack()
First, we set a variable that holds the correct password. In this case, "I don't know". Then, we get the entered password. Finally, we compare both and inform the user accordingly.
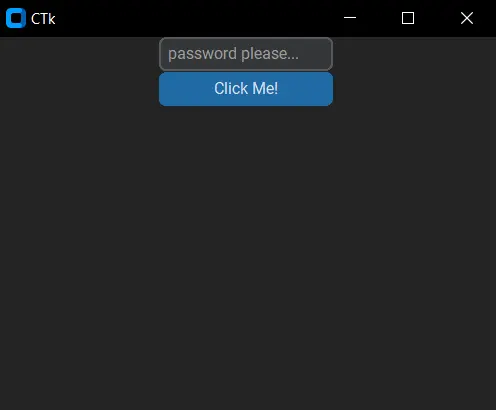
Output:
Full code:-
from customtkinter import *
app = CTk()
app.geometry("400x300")
password = CTkEntry(app, placeholder_text="password please...")
password.pack()
def clicked():
    cp = "I don't know"
    p = password.get()
    if p == cp:
        label = CTkLabel(app, text="Correct password")
        label.pack()
    else:
        label = CTkLabel(app, text="Incorrect password")
        label.pack()
btn = CTkButton(master=app, text="Click Me!", command=clicked)
btn.pack()
app.mainloop()
Conclusion
With this, we come to the end of this post.
We discussed what are GUIs.
Why we are using the customtkinter library?
Next, we saw a basic structure of GUI in customtkinter.
Lastly, we dealt with positioning and some basic widgets in this library.
We also made a simple GUI app that detects whether the entered password matches the correct password or not.
Challenge 🧗♀️
Your challenge is to write the same code in OOP. And to figure out how to change the title in the window that is customtkinter by default.
This is because you should write all your GUI code in OOP form. It is also mentioned in the customtkinter documentation.
Read the hint only when you can’t solve it without it.
Hint:-
from customtkinter import *
class App(CTk):
    def __init__(self):
        super().__init__()
        #initialize all the variables here
    #clicked fuction would come here
if __name__ == "__main__":
    app = App()
    app.mainloop()
I’ll see you in the next post with some more exciting things that you can do with this library. Till then solve the challenge and have a great time😊. Bye Bye👋


This is my first time visit at here and i am in fact pleassant to read all at single place.
I was stuck trying to create a modern GUI with Tkinter, but this post introduced me to CustomTkinter and it’s amazing! The examples were easy to follow and the layouts looked great. Can’t wait to dive deeper into this library and create some stunning GUIs.
Glad it helped. Here you can see all the articles related to customtkinter:- https://python-hub.com/category/customtkinter-in-python-modern-gui/
Wow, I’m really impressed by the ease of use of CustomTkinter. I’ve been struggling with traditional Tkinter for a while, but this tutorial made it seem so much simpler. Can’t wait to apply these techniques to my own projects!
Glad to know it was helpful. Would love to see your projects!!
Loved the tutorial! I’ve been wanting to create modern-looking GUIs in Python and this intro to CustomTkinter has really helped me get started. The examples were easy to follow and the code was well-structured. Looking forward to diving deeper into the library now!
Glad you liked it! There’s a lot to that library, checkout here: https://python-hub.com/category/python-level2-for-intermediaries/python-gui/
Great post! I love how you broke down the concepts of CustomTkinter. The examples really help illustrate how to create modern-looking GUIs. Excited to try these out in my projects!
Would love to see your upcoming projects! All the very best.