Firebase Storage No Longer Free? Try This Free Alternative – ImageKit.io
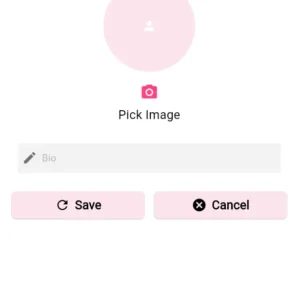
Today we will start out with setting and updating the profile image of the user.
Just when I was starting out to use Firebase Storage I realized that; It was no longer free!
But luckily today I got to know about imagekit.io just a few hours ago.
It provides 5GB of free storage which I believe will suffice our Connect app at this stage.
If I did not find this one I might have used Supabase.
Or would use python-hub’s storage facilities instead.
But let’s try out imagekit for today.
Disclaimer: This article is based on personal experience and is not intended to promote any specific service or product.
Firebase Storage No Longer Free? Try This Free Alternative – ImageKit.io
Contents
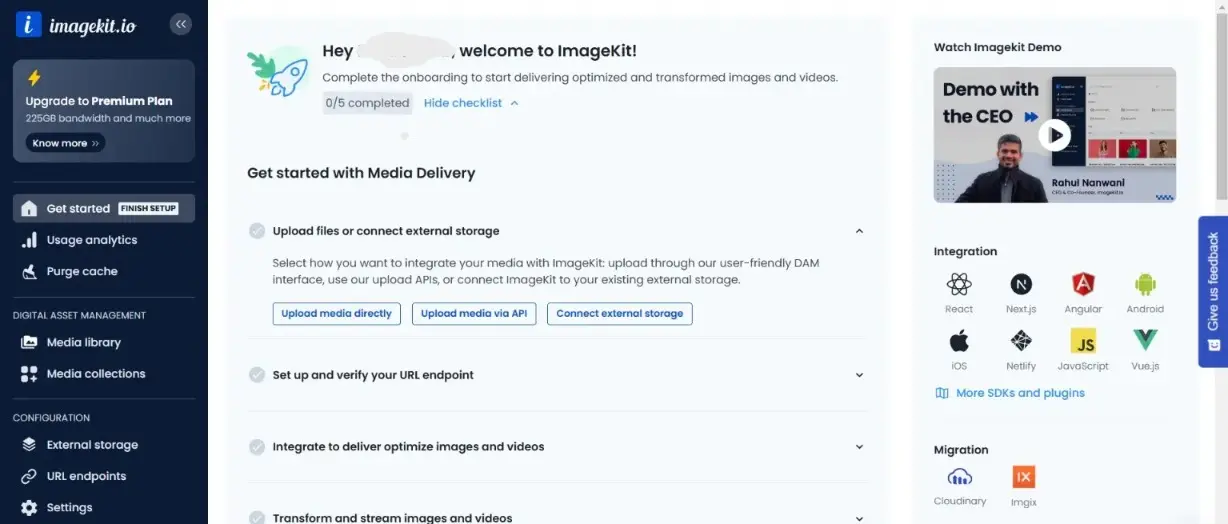
Step 1: Create an Account on ImageKit.io
Create an account with imagekit.io.
You would need to provide a few details about yourself herein.
- Select your details.
- Choose your imagekit ID and the server location.
- Tell them, from where you heard about them. Which in this case might be this blog.
You’ll see something like this:
Step 2: Get API Credentials And Dependencies
There are mainly two ways to integrate this as you can see.
- Upload media directly
- Upload media Via API
The second is way more secure, compared to the first one.
➡️Click To Know Why?
Uploading images or files via an API is more secure than uploading them directly to ImageKit.io because it allows you to keep your private API keys confidential.
When you upload directly from the client side (e.g., a user’s browser), you would need to expose your API keys, which could be compromised.
By handling uploads through your server using the API, you can securely manage and protect your private keys, reducing the risk of unauthorized access to your account.
That’s why scroll down in the sidebar.
Go to developer options.
Copy the following credentials:
- Public API Key
- Private API Key (Keep this secret!)
- URL Endpoint
Keep them extremely safe.
Now there are 3 possible dependencies that can help us with imagekit.io API calls:
- Dio
- imagekit
- flutter_imagekit
Dio is a powerful and flexible HTTP client for Flutter it is high-performance with built-in support for interceptors, cancellation, and retry mechanisms.
It can be used to manually handle authentication and upload images efficiently. And gives you complete control over requests and responses.
The other although are specifically designed for imagekit are not as actively maintained and customizable.
That’s why I do not recommend using these.
Dio seems like the best choice here.
So, get these dependencies:
flutter pub add dio
flutter pub add file_picker
Firebase Storage No Longer Free? Try This Free Alternative – ImageKit.io Firebase Storage No Longer Free? Try This Free Alternative – ImageKit.io Firebase Storage No Longer Free? Try This Free Alternative – ImageKit.io Firebase Storage No Longer Free? Try This Free Alternative – ImageKit.io
Step 3: Why Not Chopper Or Http Or Retrofit?
Now, if you are someone like me you would have gone through the internet out of curiosity and might have come across this:
I use http with chopper and the implementation is so clean. I have every feature I need like auth or custom interceptors. I don’t use dio by choice because anything essential like this that is not offered officially might break with new updates. Also I have a prejudice to it because every project made by a bad developer always has dio and bloc.
It’s on Reddit. Click here to read it.
Let’s first understand the pros and cons of each.
Each of these HTTP clients has its own strengths and weaknesses.
Here’s a comparison:
🔹 Dio
✅ Pros:
- Supports interceptors (for handling authentication, logging, etc.).
- Has built-in support for file uploads, timeouts, and retries.
- Supports cancellation tokens (useful for preventing unnecessary API calls).
- Handles complex API requests efficiently.
❌ Cons:
- A bit heavier than
http. - Not as structured as
retrofit.
🔹 http (Flutter’s built-in package)
✅ Pros:
- Lightweight and built into Flutter.
- No extra dependencies required.
- Good for simple requests.
❌ Cons:
- Lacks interceptors and cancellation support.
- File uploads need manual implementation.
- No built-in retry mechanism.
👉 Best for: Small projects with simple API calls.
🔹 Retrofit (Dio-based)
✅ Pros:
- Uses annotations to define APIs (similar to Retrofit in Android).
- Automatically generates API calls.
- Reduces boilerplate code.
❌ Cons:
- Depends on Dio, so if you don’t want Dio, Retrofit is not an option.
- Debugging generated code can be harder.
- Not as flexible as using Dio directly.
👉 Best for: Projects with structured API layers.
🔹 Chopper
✅ Pros:
- Uses a code-generation approach (like Retrofit).
- Supports interceptors.
- More lightweight than Dio.
❌ Cons:
- Not as widely used as Dio or Retrofit.
- Less flexibility compared to Dio.
👉 Best for: REST APIs that don’t need many customizations.
Seems like Dio is the best option right??
Then, why does the comment say so?
Firebase Storage No Longer Free? Try This Free Alternative – ImageKit.io Firebase Storage No Longer Free? Try This Free Alternative – ImageKit.io Firebase Storage No Longer Free? Try This Free Alternative – ImageKit.io Firebase Storage No Longer Free? Try This Free Alternative – ImageKit.io
Step 4: Is Dio a bad choice with BLoC?
Some people say Dio + BLoC is not a good combination because:
- Dio uses Streams internally for requests, and BLoC also uses Streams, which can sometimes cause conflicts.
- Dio is an imperative API (it runs code directly), while BLoC is reactive (it reacts to events). This can make them feel a bit disconnected.
- Some developers prefer using Repository + BLoC instead of making Dio calls directly in the BLoC.
But if structured properly (e.g., using Dio inside a Repository), it works perfectly fine.
👉 Solution? Use Dio inside the Repository layer and call it from BLoC.
Thus BLoC with Dio inside a repository layer is a good option.
Firebase Storage No Longer Free? Try This Free Alternative – ImageKit.io Firebase Storage No Longer Free? Try This Free Alternative – ImageKit.io Firebase Storage No Longer Free? Try This Free Alternative – ImageKit.io Firebase Storage No Longer Free? Try This Free Alternative – ImageKit.io
Step 5: Why file_picker for Our Connect App?
| Package Name | Web Support | Pros | Cons |
|---|---|---|---|
| file_picker | ✅ Yes | Works for images, videos, PDFs, etc. | No built-in cropping or camera |
| image_picker_for_web | ✅ Yes | Web-specific version of image_picker | Only works on web, no camera |
| image_cropper | ❌ No | Provides built-in cropping features | Doesn’t support web |
| camera | ✅ Yes | Best for capturing images from a camera | More setup required |
| flutter_webrtc | ✅ Yes | Can capture images from camera on web | Advanced, harder to set up |
File_Picker:
✅ Cross-Platform Support – Works on Android, iOS, Web, and Desktop seamlessly.
✅ Stable & Lightweight – Less prone to crashes compared to image_picker.
✅ Flexible – Can handle images, videos, and even PDFs if needed.
✅ No Extra Setup for Web – Unlike image_picker, it works natively in browsers without issues.
✅ Future-Proof – If we add candid capturing later, we can integrate the camera package without conflicts.
🔹 Conclusion: file_picker is the best choice for uploading profile pictures & sharing images smoothly in our Connect app.
Conclusion
Since I was picking a new tool upfront, I figured—why not break down the thought process?
Choosing the right package isn’t just about what’s trending; it’s about what actually works for your project.
A little research, a few roadblocks, and boom—problem solved.