Registering Users and Building a Smooth Navigation
I guess the articles are getting pretty boring these days, don’t you?
That’s why I am planning to talk to you as if I am talking to you a human, not a robot(like myself).
How many times have people given you the pet name of a robot??
(To me every other day).
My designer hated the loading screen and told me it was blurry that’s why I tried to find different gifs but none of them were good and high quality together.
That’s why I added an image instead.
I used this image from Freepik.
The change is posted on GitHub already.
Now let’s start with creating a wormhole to our app.
Register page I mean.
Registering Users and Building a Smooth Navigation
Contents
Step 1: Setting Up Registration on the Frontend
Registering Users and Building a Smooth Navigation Registering Users and Building a Smooth Navigation Registering Users and Building a Smooth Navigation Registering Users and Building a Smooth Navigation Registering Users and Building a Smooth Navigation Registering Users and Building a Smooth Navigation
Before we dive into Firestore, let’s first make sure the register page is actually collecting the user’s input correctly.
📌 Create Controllers for Input Fields
In your register_page.dart, create four TextEditingControllers for:
- Name
- Password
- Confirm Password
📌 Write the Register Method
Below the controllers, create a method register() that:
- Passes the data to the authentication Cubit for further processing.
- Fetches user input from the text fields.
- Validates the input (Check if fields are empty).
- Checks if passwords match before proceeding.
📌 Dispose Controllers When Done
Memory leaks? No, thanks. 😅 Add dispose() inside your StatefulWidget.
➡️Click to view the code for the register method
  void register() {
    String name = nameController.text;
    String email = emailController.text;
    String password = passwordController.text;
    String confirm = confirmController.text;

    final authCubit = context.read<CAuthCubit>();

    if(name.isNotEmpty  && email.isNotEmpty && password.isNotEmpty && confirm.isNotEmpty){

      if(password == confirm) {
        authCubit.register(name, email, password);
      }
      else {
        ScaffoldMessenger.of(context).showSnackBar(const SnackBar(content: Text("Passwords Don't Match!!")));
      }

    } else {
      ScaffoldMessenger.of(context).showSnackBar(const SnackBar(content: Text("Please Enter All Details!!")));
    }
  }

  @override
  void dispose() {
    nameController.dispose();
    emailController.dispose();
    passwordController.dispose();
    confirmController.dispose();
    super.dispose();
  }
👉 At this stage, we can collect user data properly. But where does it go? Now let’s connect it to Firestore.
Step 2: Storing Registered Users in Firestore
Registering Users and Building a Smooth Navigation Registering Users and Building a Smooth Navigation Registering Users and Building a Smooth Navigation Registering Users and Building a Smooth Navigation Registering Users and Building a Smooth Navigation Registering Users and Building a Smooth Navigation
Now that our frontend is gathering user data, it’s time to store it in Firestore.
📌 Head Over to Firebase Console
- Open Firebase Console
- Click on Firestore Database in the left sidebar.
- Create a new database (Select a region of your choice).
- Set it to production mode for now.
📌 Update Firestore Rules for Testing
Before testing, update your Firestore security rules:
➡️Click to view how the code should look
rules_version = '2';

service cloud.firestore {
  match /databases/{database}/documents {
    match /{document=**} {
      allow read, write: if true;
    }
  }
}
⚠️ This is unsafe! Only for testing—we’ll fix it before deployment.
📌 Modify Your firebase_auth_repo.dart to Store Users in Firestore
Now, let’s store user data in Firestore after successful registration.
And add a package to manage this database through your code.
flutter pub add cloud_firestoreGo ahead and get to the features/auth/data/firebase_auth_repo.dart
Landed safely?
In the CAuthRepo class create a FirebaseFirestore instance.
Now go to the registerWithEmailPassword method.
After the user is created save its data to the Firestore database.
➡️Click to view registerWithEmailPassword method
final FirebaseFirestore firebaseFirestore = FirebaseFirestore.instance;

@override
  Future<CAppUser?> registerWithEmailPassword(String name, String email, String password) async {
    try {
      // Attempt to create a new user with email and password
      UserCredential userCredential = await firebaseAuth.createUserWithEmailAndPassword(
        email: email,
        password: password,
      );

      // Create a CAppUser instance with user details
      CAppUser user = CAppUser(
        uid: userCredential.user!.uid, // Unique user ID from Firebase
        email: email, // User's email
        name: name, // Name provided by the user during registration
      );

      // save user's data in firebase database.
      await firebaseFirestore
      .collection('users')
      .doc(user.uid)
      .set(user.toJson());

      return user;
    } catch (e) {
      // Catch any errors and throw a custom exception
      throw Exception('Registration Failed: $e');
    }
  }
FirebaseFirestore follows:
- Collections
- ->Documents(Each collection has a group of documents)-
- ->Data(Each document has data stored in key and value pairs.)
- ->Documents(Each collection has a group of documents)-
Here’s how it looks:
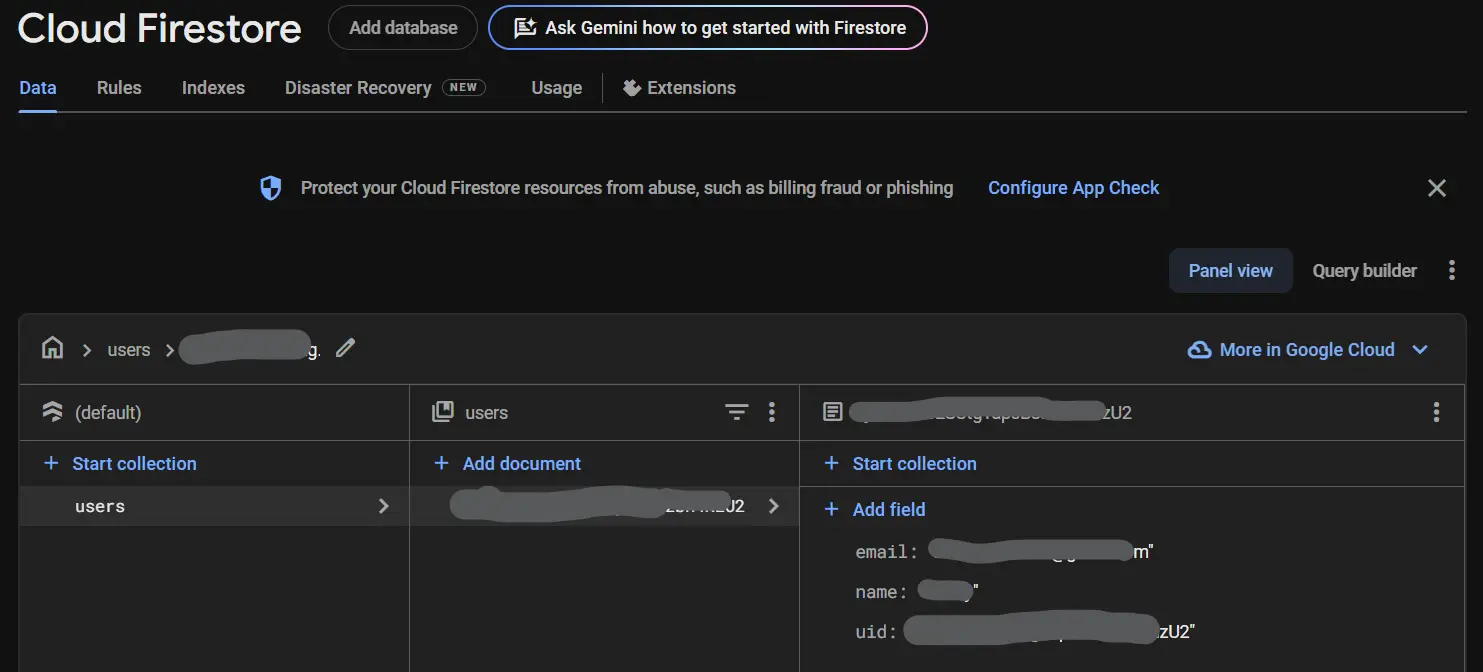
📌 Test It!
Try registering a user and check Firestore. If everything is set up correctly, you’ll see a new “users” collection with user documents inside.
🎉 Now our registration is functional with Firestore!
Now, let’s do some navigation.
Registering Users and Building a Smooth Navigation Registering Users and Building a Smooth Navigation Registering Users and Building a Smooth Navigation Registering Users and Building a Smooth Navigation Registering Users and Building a Smooth Navigation Registering Users and Building a Smooth Navigation Registering Users and Building a Smooth Navigation
Step 3: Responsive Navigation (With a Mission)
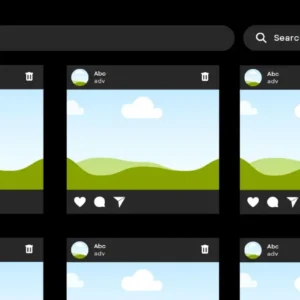
When the user gets through the wormhole all they get to see is a blank screen that says connect.
It’s not a good idea to stuff our home page with all the features.
The user will be extremely confused.
That’s why let’s create a map. I mean a navigation.
Out of all the navigations I have seen I love bottom navigation for mobile.
And I haven’t decided for desktop yet.
But I guess the sidebar looks cool. So do the tabs.
Which ones do you like??
“Your mission: Pick your favorite navigation style—Bottom Navbar? Sidebar? Tabs? Comment below, and let’s make it happen together!”
I surfed almost everywhere. And because my designer went on leave(joking) I decided it to make it like any other social app.
Left side menu(sidebar) that has a profile pic followed by username followed by other menus.
NOTE: I might change a lot of things later on this is just to set everything up.
Now, I tried building different navigation for both. Not only it made the app heavy but it didn’t seem user-friendly at all.
I saw this package of Flutter Sidebarx. It is relatively new but it seemed good to me to add both the navigations.
I’ll first rename the post feature directory to home.
Then, let’s create a new feature profile. Inside it presentation/pages/profile_page.dart
Keep it this way for now.
The sidebar thing alone has taken more than 2 hours today.
Too tired. But 3 more steps.
Let me explain what you need to create first:
➡️Click To View the Files you need to create
|---home/
|   |---presentation
|       |---pages
|           |---home_page.dart
|       |---components
|           |---sidebar_x.dart
|       |---cubits
|           |---navigation_cubit.dart
|---profile/
|   |---presentation
|       |---pages
|           |---profile_page.dart
|---settings/
|   |---presentation
|       |---pages
|           |---settings_page.dart
|---lib/utils/main_screen.dart
Now, in the home, profile, and settings pages:
- Create a stateful widget, and inside the Scaffold, provide a center-aligned text saying “home”, “profile”, and “settings”, respectively.
- Now, in the navigation cubit create an integer cubit that emits the index state
- In the
main_screen.dartcreate a sidebar controller and list of pages. - Then use a row to provide a sidebar along with the selected page. Expanded widget and bloc builder will be used.
- Lastly, design the sidebar your way.
The code is in the GitHub repository.
And I know that the design currently sucks. But as we move ahead, I promise it will all look beautiful and modern.
Step 4: Create Profile Desktop UI
Again for this one too we will have a simple UI.
And I have modified the theme file and the sidebar a little. You can check that on GitHub.
Create a components folder in the presentation directory of the profile.
We are going to have 3 files here:
- profile_card_widget.dart
- stat_item.dart
- stats_widget.dart
We will create the complete profile layout of the desktop in our profile_card_widget.dart.
If I go on to explain this, it would be super long. If you cannot understand anything just do let me know in the comments below.
➡️Click To View profile_card_widget.dart
import 'package:connect/features/profile/presentation/components/stats_widget.dart';
import 'package:connect/utils/responsive_helper.dart';
import 'package:flutter/material.dart';

class CProfileCardWidget extends StatelessWidget {
  @override
  Widget build(BuildContext context) {
    final res = ResponsiveHelper(context);
    return Container(
      width: res.width(60) ,
      height: res.height(80),
      child: Card(
        shape: RoundedRectangleBorder(borderRadius: BorderRadius.circular(20)),
        elevation: 10,
        child: Padding(
          padding: const EdgeInsets.all(20.0),
          child: Column(
            mainAxisSize: MainAxisSize.min,
            children: [
              const CircleAvatar(
                radius: 50,
                child: Icon(Icons.person),
              ),
              const SizedBox(height: 10),
              Text('Samantha Jones', style: TextStyle(color:Theme.of(context).colorScheme.tertiary, fontSize: 28, fontWeight: FontWeight.bold)),
              Text('New York, United States', style: TextStyle(color: Theme.of(context).colorScheme.tertiary)),
              const SizedBox(height: 10),
              const Text('Web Producer - Web Specialist\nColumbia University - New York', textAlign: TextAlign.center, style: TextStyle(fontSize: 14)),
              const SizedBox(height: 15),
              const StatsWidget(),
              const SizedBox(height: 15),
              ElevatedButton(
                onPressed: () {},
                style: ElevatedButton.styleFrom(
                  shape: const StadiumBorder(),
                  backgroundColor: Theme.of(context).canvasColor,
                  padding: const EdgeInsets.symmetric(horizontal: 20, vertical: 10),
                ),
                child: const Text('Show Posts'),
              ),
            ],
          ),
        ),
      ),
    );
  }
}
To show the follower/following count, photo count, etc we have created the stat_item.dart tile.
➡️Click To View stat_item.dart
import 'package:flutter/material.dart';
class StatItem extends StatelessWidget {
  final String label;
  final String count;


  const StatItem({super.key, required this.label, required this.count});

  @override
  Widget build(BuildContext context) {
    return Padding(
      padding: const EdgeInsets.all(14.0),
      child: Column(
        children: [
          Text(count, style: const TextStyle(fontSize: 15, fontWeight: FontWeight.bold)),
          Text(label, style: const TextStyle(fontSize: 11)),
        ]
      ),
    );
  }
}
Then, to arrange these tiles in a row, we created the stats_widget.dart
➡️Click To View stats_widget.dart
stats_widget.dartimport 'package:connect/features/profile/presentation/components/stat_item.dart';
import 'package:flutter/material.dart';
class StatsWidget extends StatelessWidget {
const StatsWidget({super.key});
@override
Widget build(BuildContext context) {
return const Row(
mainAxisAlignment: MainAxisAlignment.center,
children: [
StatItem(label: 'Photos', count: '65'),
StatItem(label: 'Followers', count: '43'),
StatItem(label: 'Following', count: '21'),
],
);
}
}
Lastly, we need to put the profile card widget in the profile_page.dart
➡️Click To View profile_page
profile_pageimport 'package:connect/features/profile/presentation/components/profile_card_widget.dart';
import 'package:connect/utils/responsive_helper.dart';
import 'package:flutter/material.dart';
class CProfilePage extends StatefulWidget {
const CProfilePage({super.key});
@override
State<CProfilePage> createState() => _CProfilePageState();
}
class _CProfilePageState extends State<CProfilePage> {
@override
Widget build(BuildContext context) {
final res = ResponsiveHelper(context);
final isDesktop = res.width(100) >= 800; // Desktop breakpoint
return Scaffold(
appBar: AppBar(backgroundColor: Theme.of(context).colorScheme.primary,),
backgroundColor: isDesktop
? Theme.of(context).colorScheme.primary: const Color.fromARGB(255, 249, 232, 238),
body: Center(
child: SafeArea(
child: Center(
child: CProfileCardWidget()
),
),
),
);
}
}
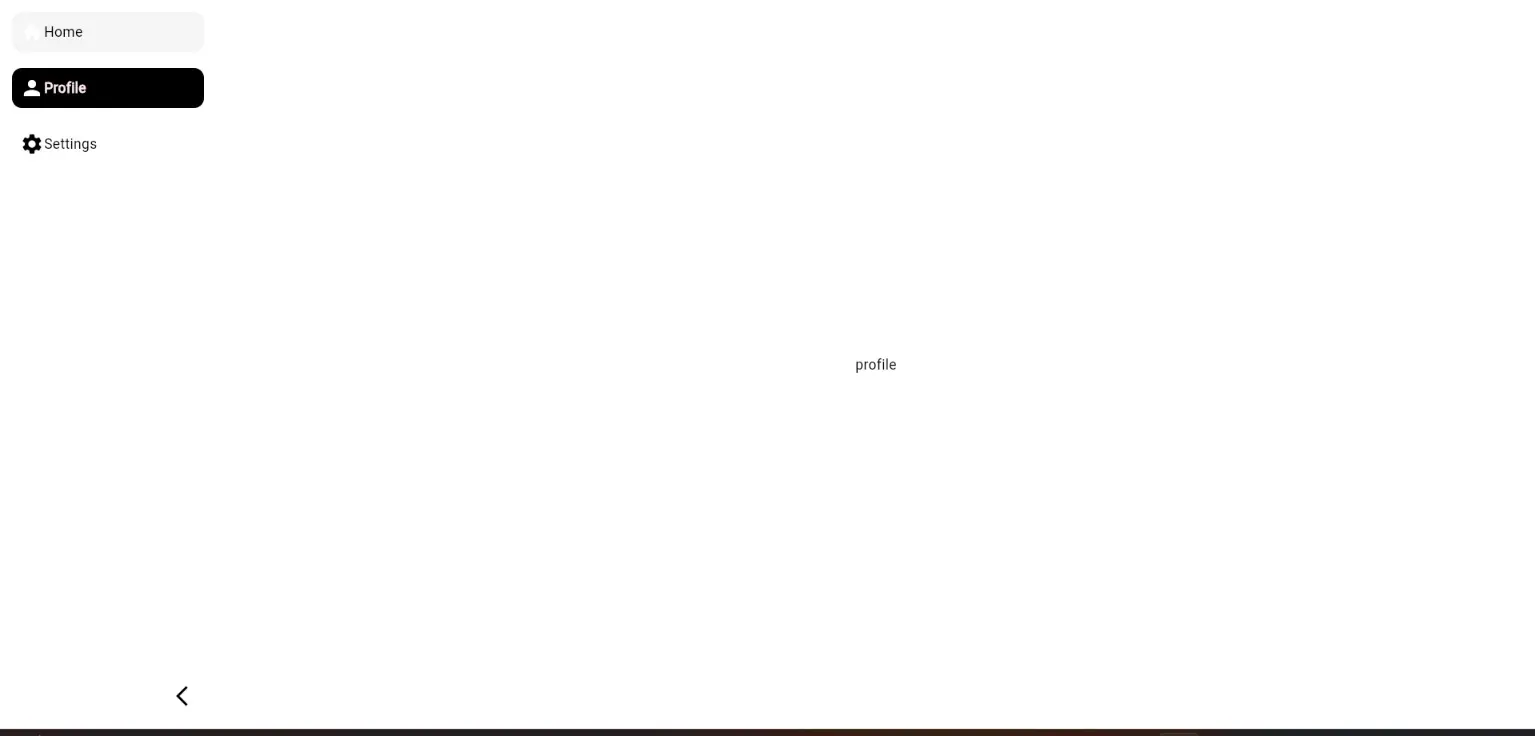
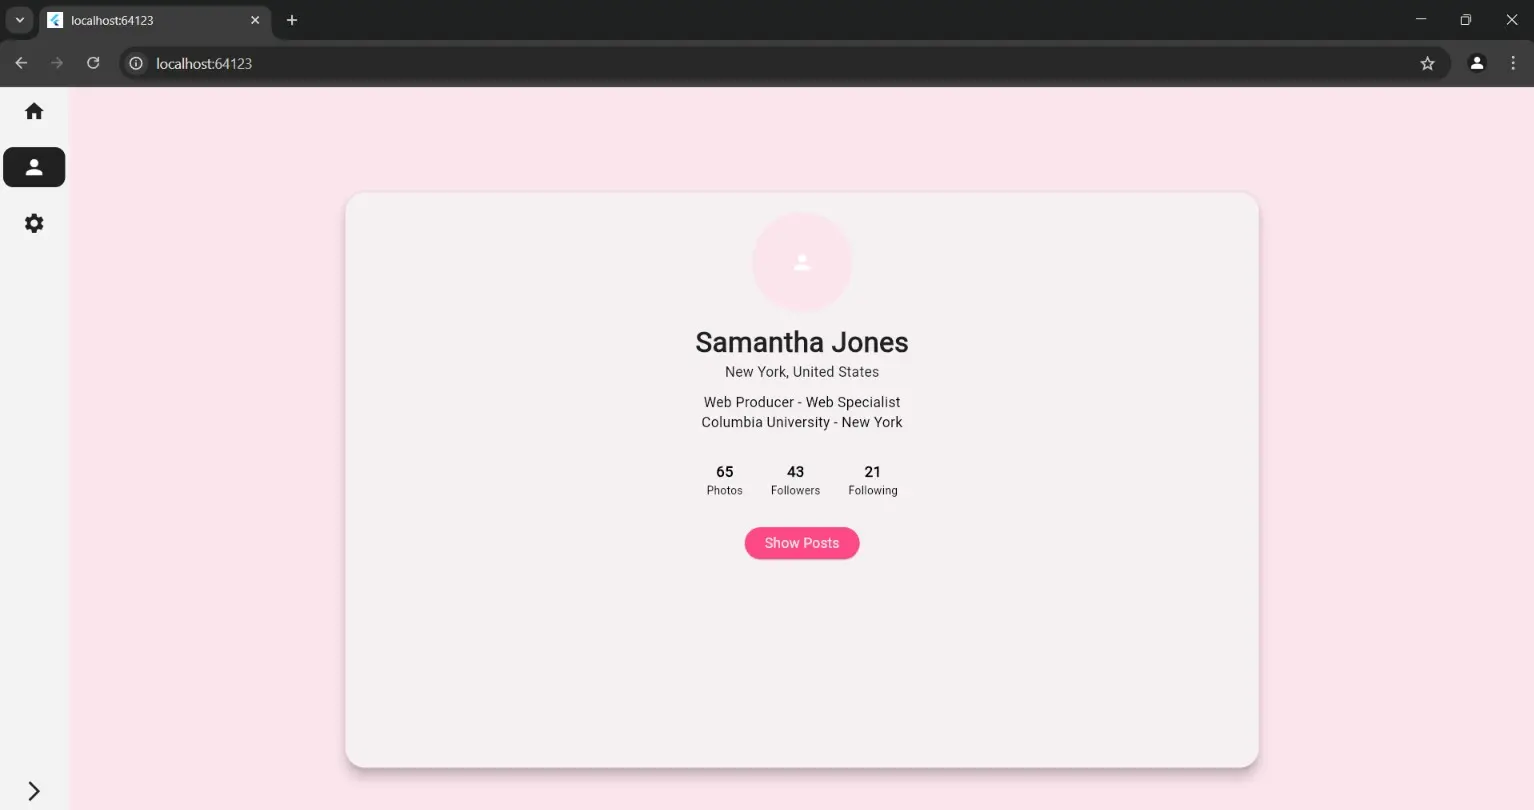
If everything goes right the desktop version will look like this:
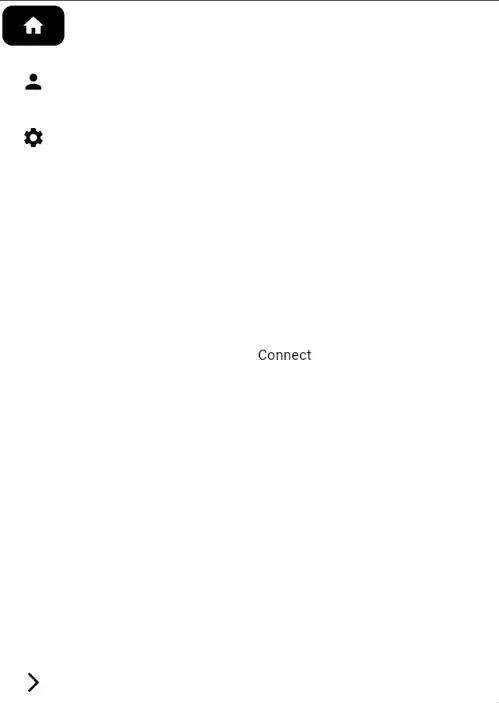
Step 5: Mobile UI Profile
For mobile, we will create 3 methods:
- _buildDesktopLayout
- _buildMobileLayout
- _buildStatItem
In the desktop one, we will just provide our profile card widget in the center widget.
In the mobile layout, we will put the code for the mobile view of the profile page.
The build stat item method is to show those stats on the mobile view of the user’s profile.
➡️Click To View profile_page
profile_pageimport 'package:connect/features/profile/presentation/components/profile_card_widget.dart';
import 'package:connect/utils/responsive_helper.dart';
import 'package:flutter/material.dart';
class CProfilePage extends StatefulWidget {
const CProfilePage({super.key});
@override
State<CProfilePage> createState() => _CProfilePageState();
}
class _CProfilePageState extends State<CProfilePage> {
@override
Widget build(BuildContext context) {
final res = ResponsiveHelper(context);
final isDesktop = res.width(100) >= 800; // Desktop breakpoint
return Scaffold(
appBar: AppBar(backgroundColor: Theme.of(context).colorScheme.primary,),
backgroundColor: isDesktop
? Theme.of(context).colorScheme.primary: const Color.fromARGB(255, 249, 232, 238),
body: Center(
child: SafeArea(
child: isDesktop
? _buildDesktopLayout(context, res)
: _buildMobileLayout(context, res),
),
),
);
}
Widget _buildDesktopLayout(BuildContext context, ResponsiveHelper res) {
return Center(child: CProfileCardWidget());
}
Widget _buildMobileLayout(BuildContext context, ResponsiveHelper res) {
return Column(
mainAxisAlignment: MainAxisAlignment.start,
children: [
Stack(
alignment: Alignment.center,
children: [
CircleAvatar(
radius: res.width(20), // Adjust size dynamically
backgroundColor: Colors.grey[300],
child:const Icon(Icons.person),
),
Positioned(
bottom: 0,
right: res.width(5),
child: const CircleAvatar(
backgroundColor: Colors.pinkAccent,
radius: 15,
child: Icon(Icons.edit, size: 16, color: Colors.white),
),
),
],
),
const SizedBox(height: 10),
const Text(
"Samantha Jones",
style: TextStyle(fontSize: 20, fontWeight: FontWeight.bold),
),
const Text(
"New York, United States",
style: TextStyle(fontSize: 14, color: Colors.grey),
),
const SizedBox(height: 20),
Row(
mainAxisAlignment: MainAxisAlignment.spaceEvenly,
children: [
_buildStatItem("65", "Photos"),
_buildStatItem("43", "Followers"),
_buildStatItem("21", "Following"),
],
),
],
);
}
Widget _buildStatItem(String count, String label) {
return Column(
children: [
Text(count,
style: const TextStyle(fontSize: 18, fontWeight: FontWeight.bold)),
Text(label, style: const TextStyle(fontSize: 14, color: Colors.grey)),
],
);
}
}
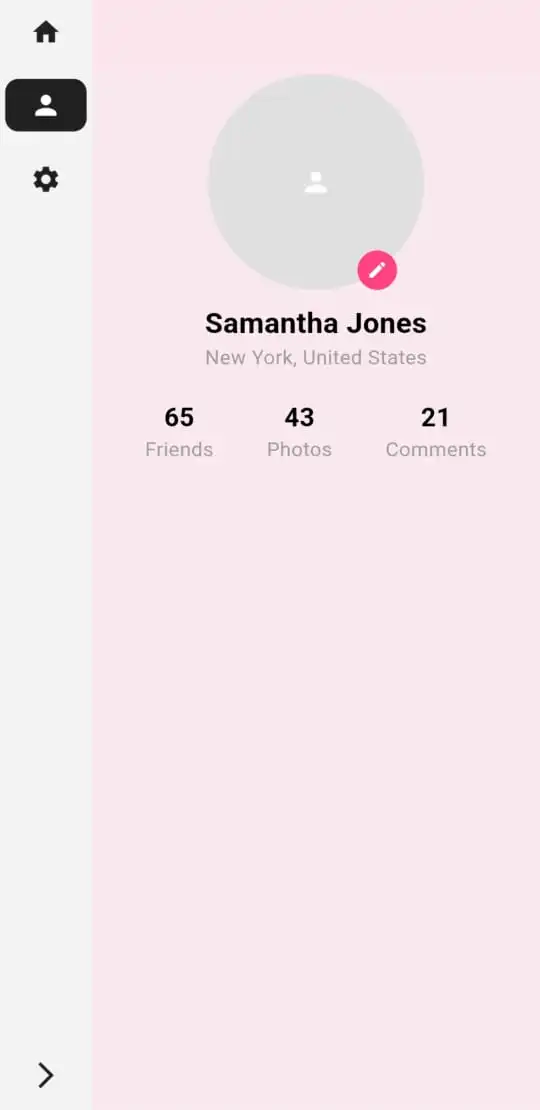
If everything goes right the mobile version will look like this: